BELKIN Easy Transfer Cable for Windows Vista™
F5U258 Quick Install Guide

Using the Windows Easy transfer Software
1. You will now see a welcome screen on both computers. Click next on both computers.

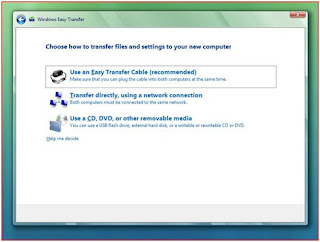
2. Next you will see a screen on the Windows XP machine asking if we want to use an Easy Transfer Cable to transfer the files.

3. Next the Windows Easy Transfer Wizard will detect both computers.
 4. Once the Windows Easy Transfer Wizard detects both computers, it will ask you what you would like to transfer.
5. Select All user accounts, files, and settings. If you wish to specific which drive to use as your destination driver please choose the advanced option.
6. The next screen will show you what folders you will transfer as well as the total size of the transfer.
 7. Then you will be asked to choose the destination of the files on the Windows Vista machine.
  8. Finally, once the transfer is complete you will get a transfer summary screen that will show what was transferred.